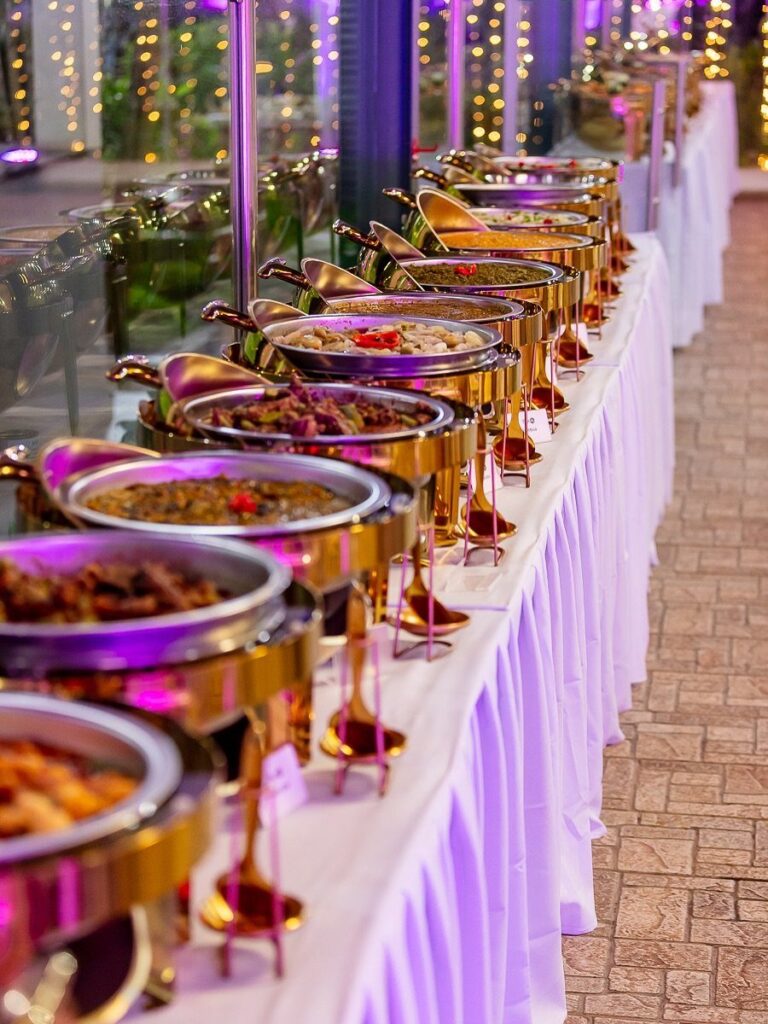
Ideas here run from a cascade of whole apples on red linens, which costs far less than another cake, to rows of gold chafing dishes matched with gold plates and flatware.
The line itself decides which one is yours: a long guest list needs a layout that keeps people moving, like plates first and cutlery at the end, or individual pedestal stations reachable from either side, while a smaller crowd can put the money into styling.
Every setup also shares one plain rule, which is food first and decor behind it, so guests never reach around anything.
1. Cutlery at the End
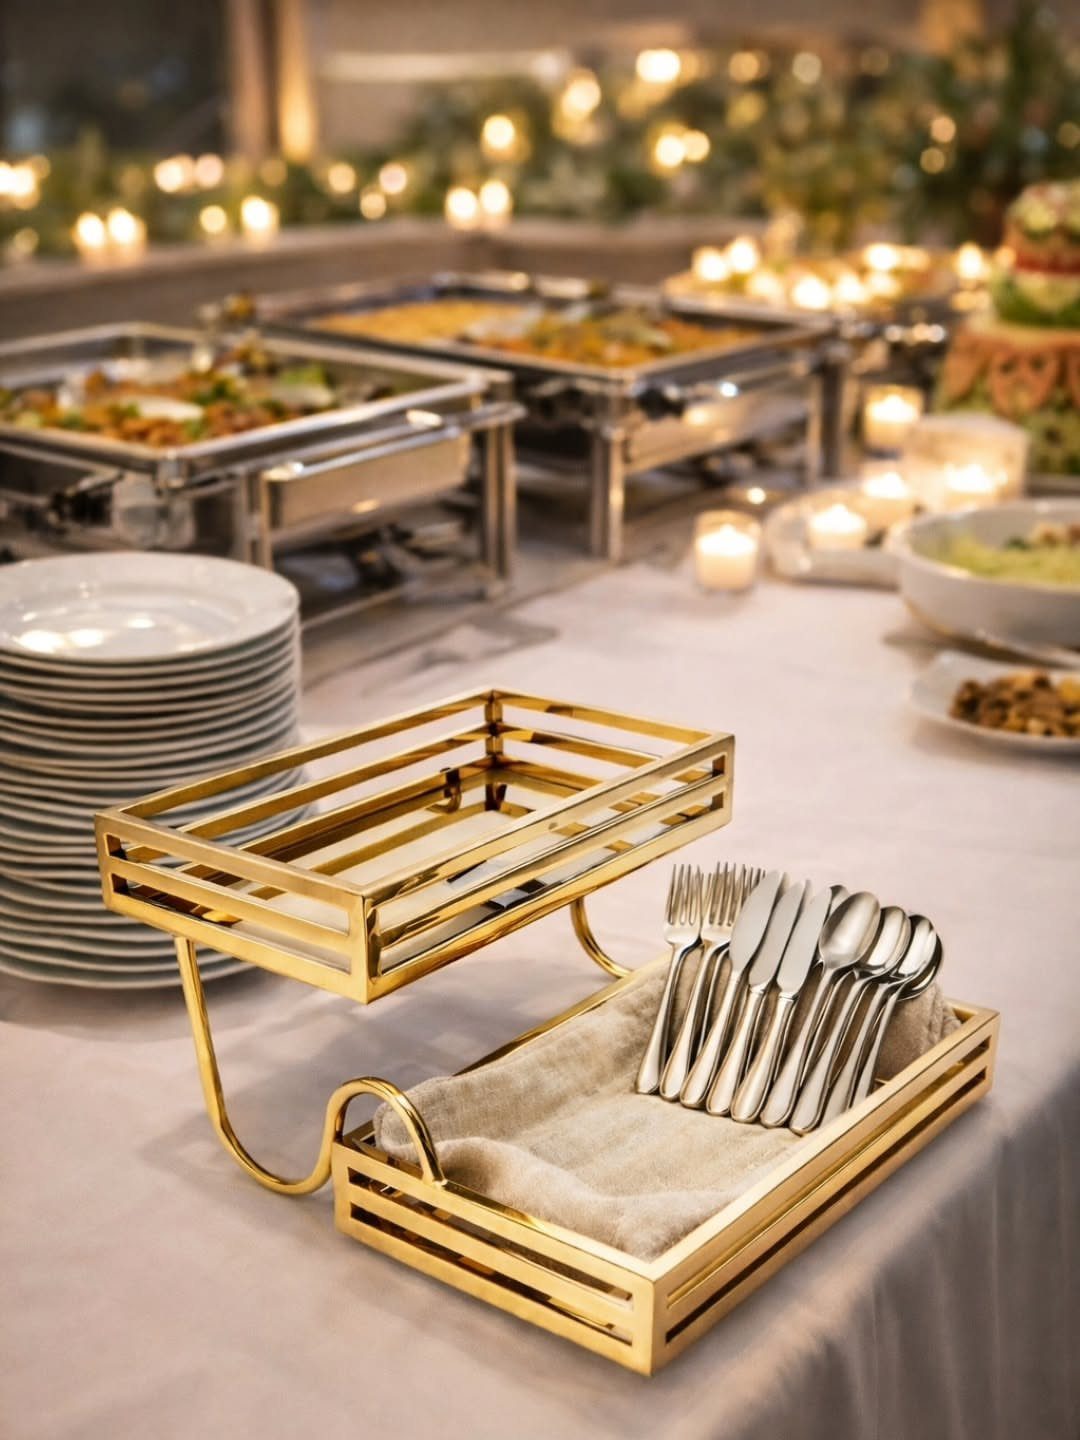
Forks, knives and spoons belong after the food, so a tiered holder, gold if it matches your decor, earns its spot at the very end of the line.
Guests are not juggling a plate in one hand and loose silverware in the other while they serve themselves.
Stand the forks, knives and spoons upright in the tiers so each handle is easy to grab. Keep the holder near the last dish rather than beside the plates.
2. Plates First
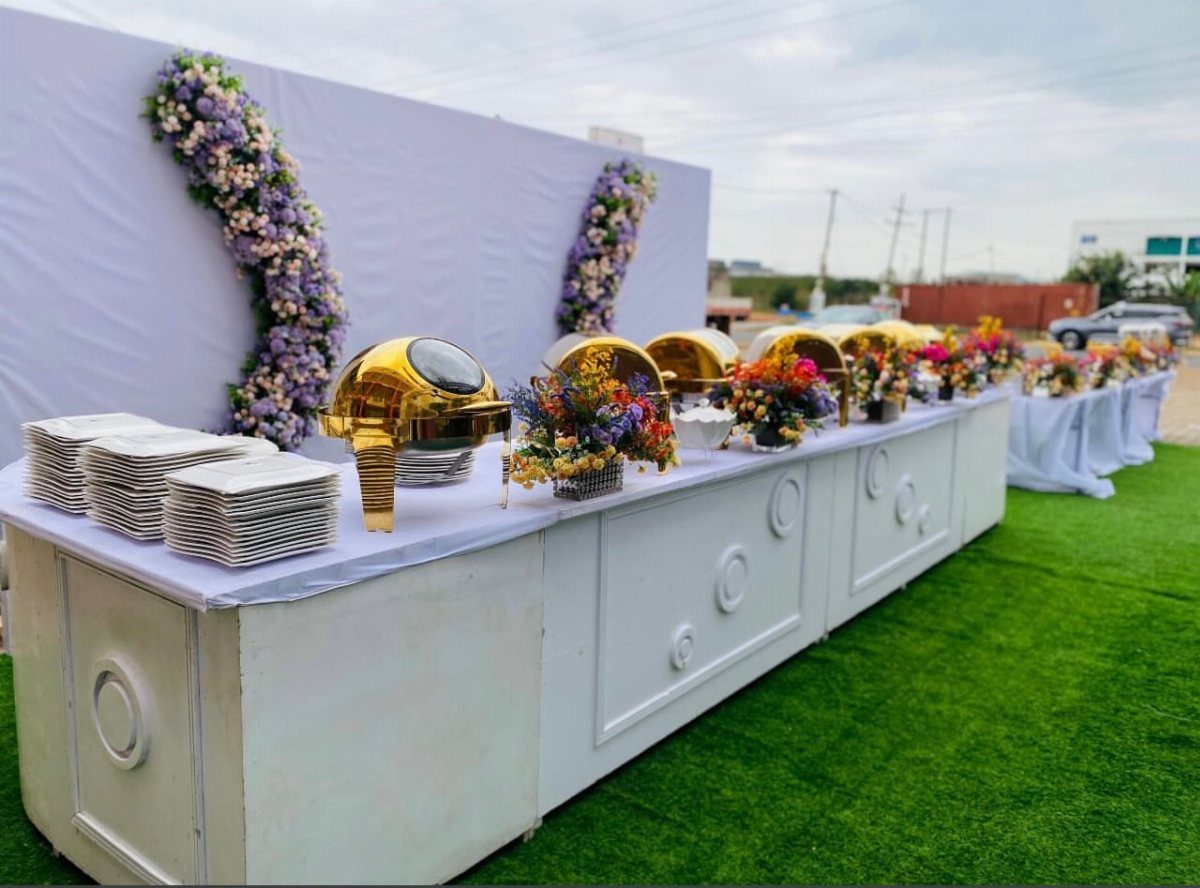
Start the line with plates, stacked where guests walk up first. In an outdoor setup like this one, with the table on grass, a clear starting point keeps people from wandering in from both ends.
Put the stack at the end nearest the entrance to the line, and leave open table space beside it so a guest can set a plate down if needed.
I would also place a second stack at the far end if the guest count is large, so the line can split in two.
3. Clearly Label All Dishes
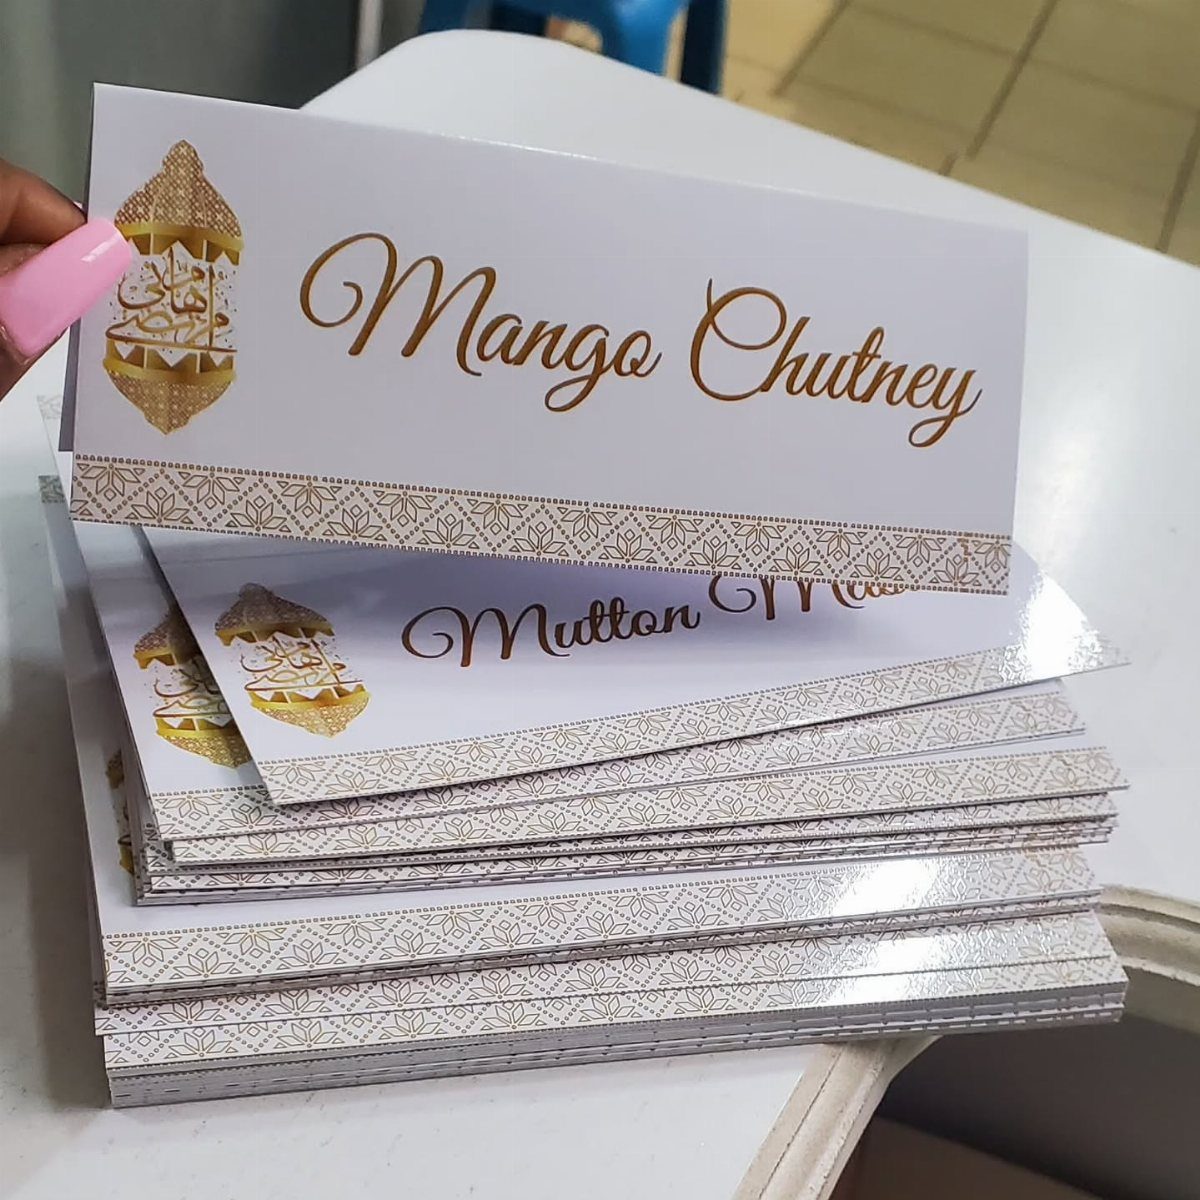
A card in front of every dish saves guests from asking and spares you from answering the same question 50 times.
Write the dish name in large, plain lettering, since people read these while holding a plate.
Add allergen notes if you can, even a short line. Print one extra card per dish in case a spill gets one.
4. Neutral Base Linens
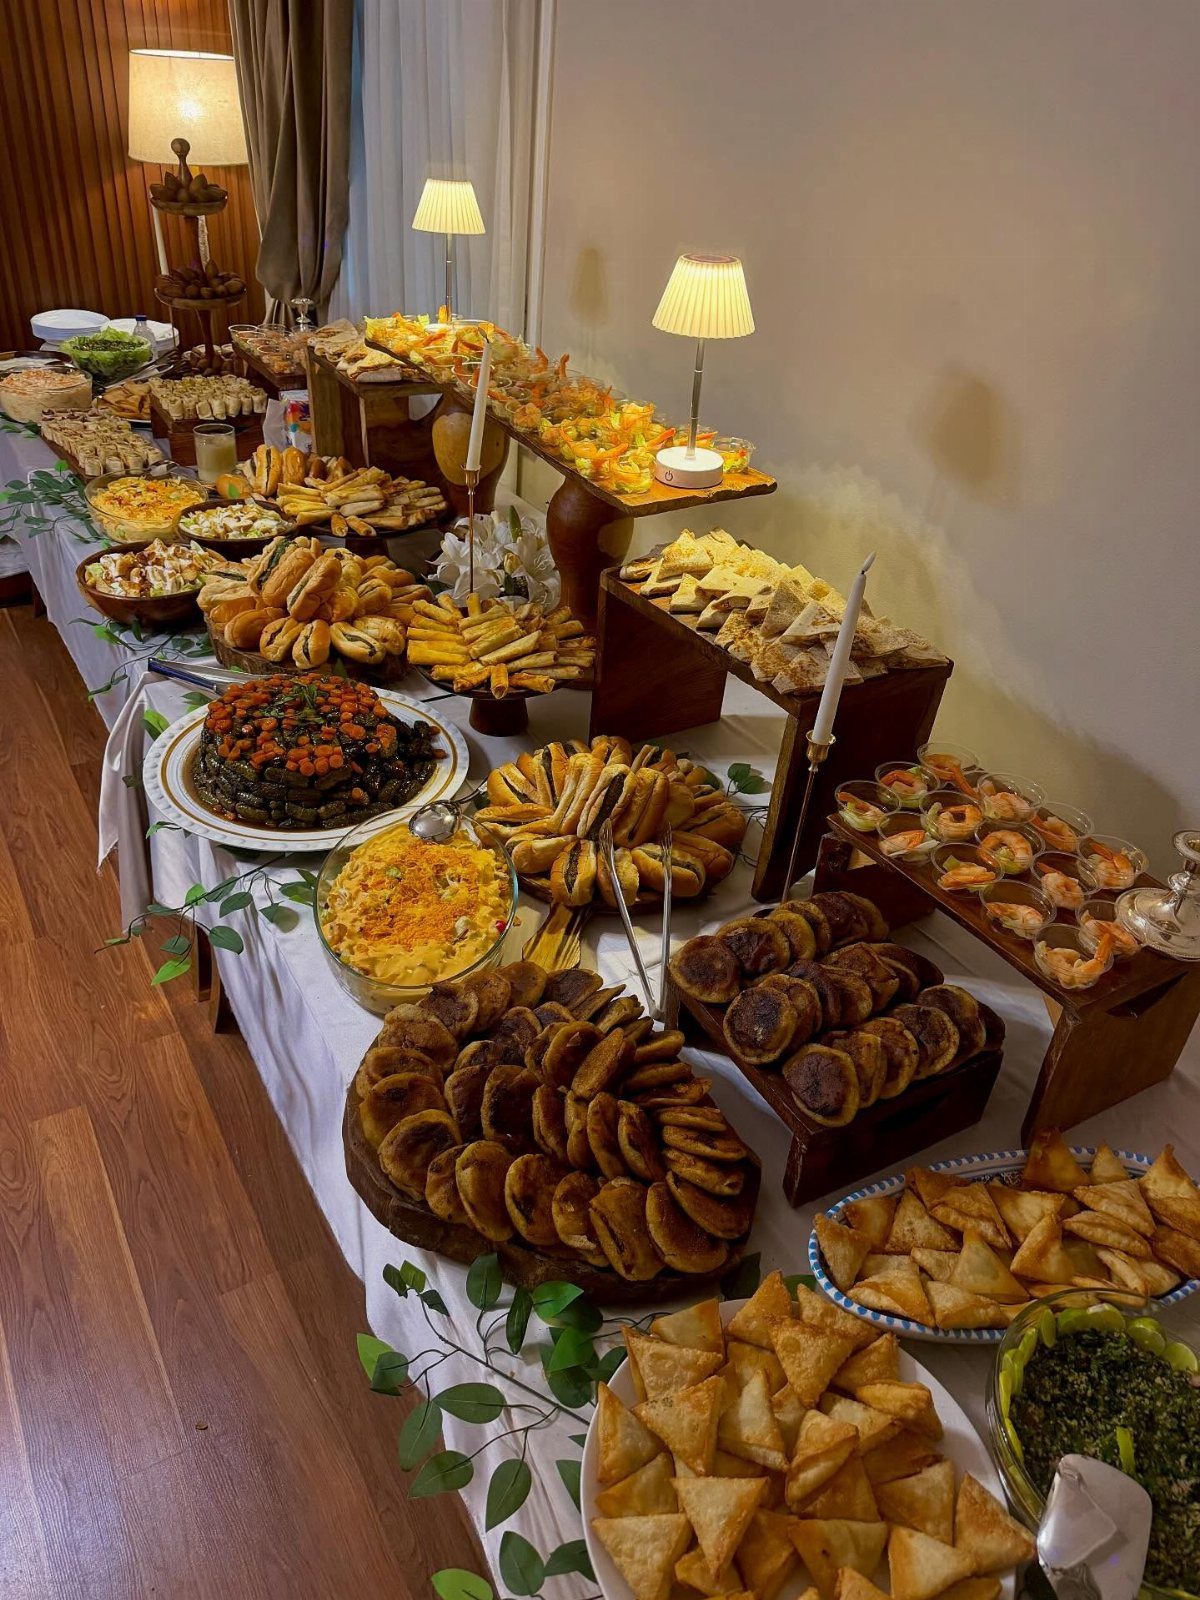
White linen is the cheapest way to make a mixed spread look planned. Wood platters, pastry in different shades, mismatched serving pieces: all of it settles down against one plain cloth.
Choose a cloth that reaches nearly to the floor, so the table legs and any boxes underneath stay hidden.
Press out the creases before the event, because a plain white surface shows every fold. Save color for the food and the risers.
5. Create an Instagram-worthy Backdrop
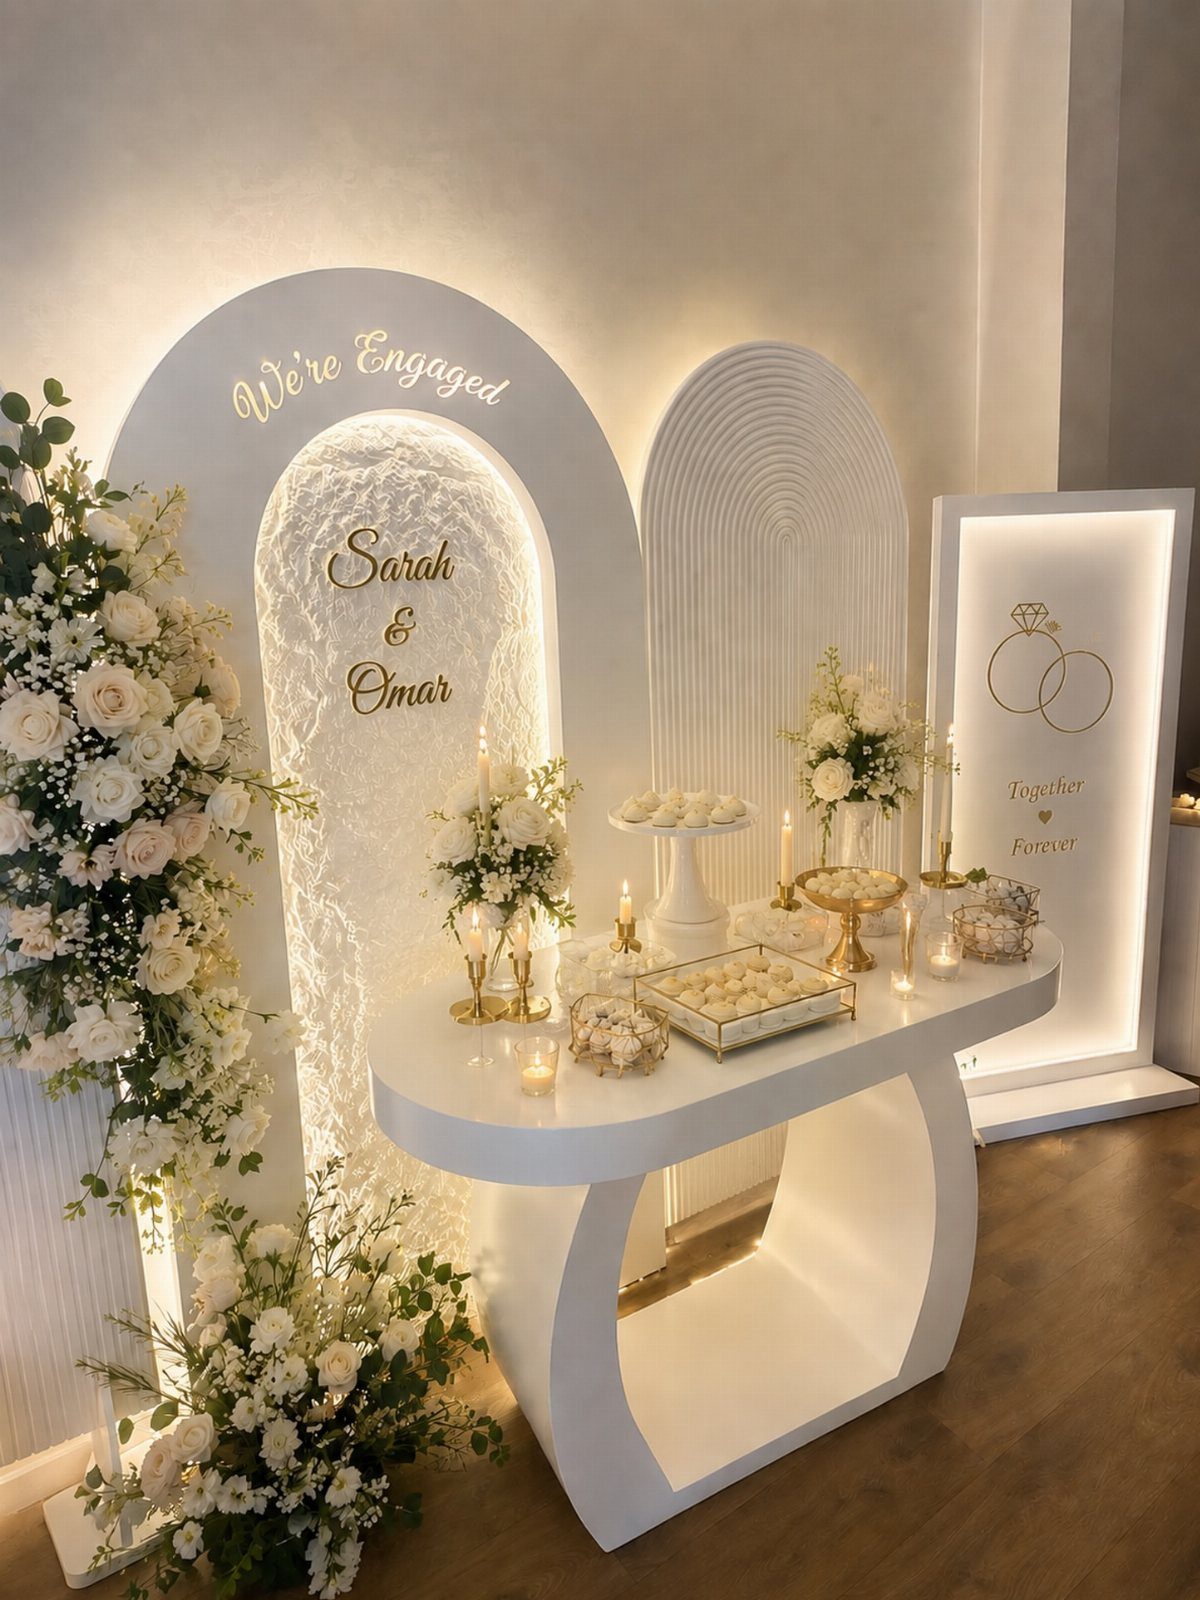
A dessert table with an arch behind it turns sweets into a photo spot, and guests will stand there anyway to pick something out.
Printing names and a line like "Together Forever" on the backdrop gives them a reason to pose.
Keep the arch in white, as here, so the sweets and flowers carry the color.
Rent or borrow one if your budget is tight. Short sign text reads best from a few steps away.
6. Seasonal Flowers, Candles
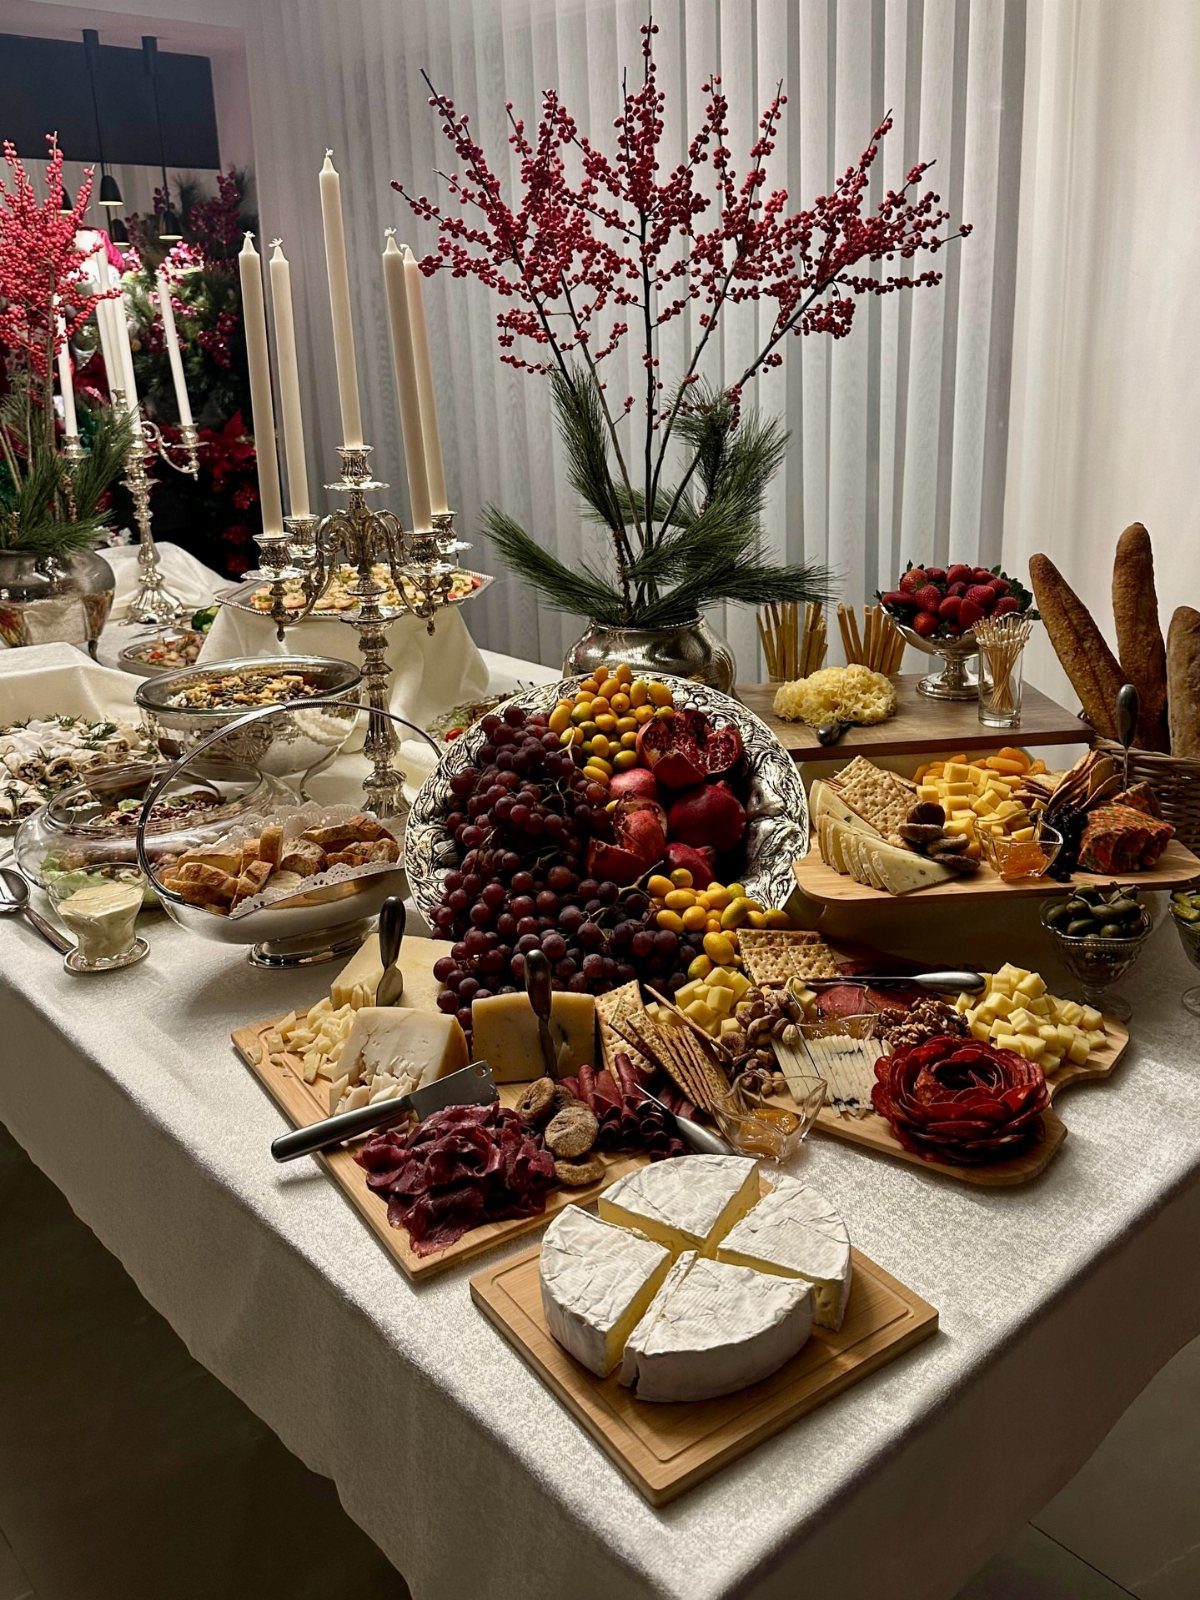
Red berry branches, pine greenery and tall white candles make a buffet feel like a particular season instead of a generic spread. A plain white curtain behind it lets those few pieces stand out.
Pick the greenery and berries that match your wedding month, and set the candles at different heights along the back of the table.
I prefer keeping decor behind the food so guests never have to reach around it. Check your venue’s candle rules before buying.
7. Gold Chafing Dishes
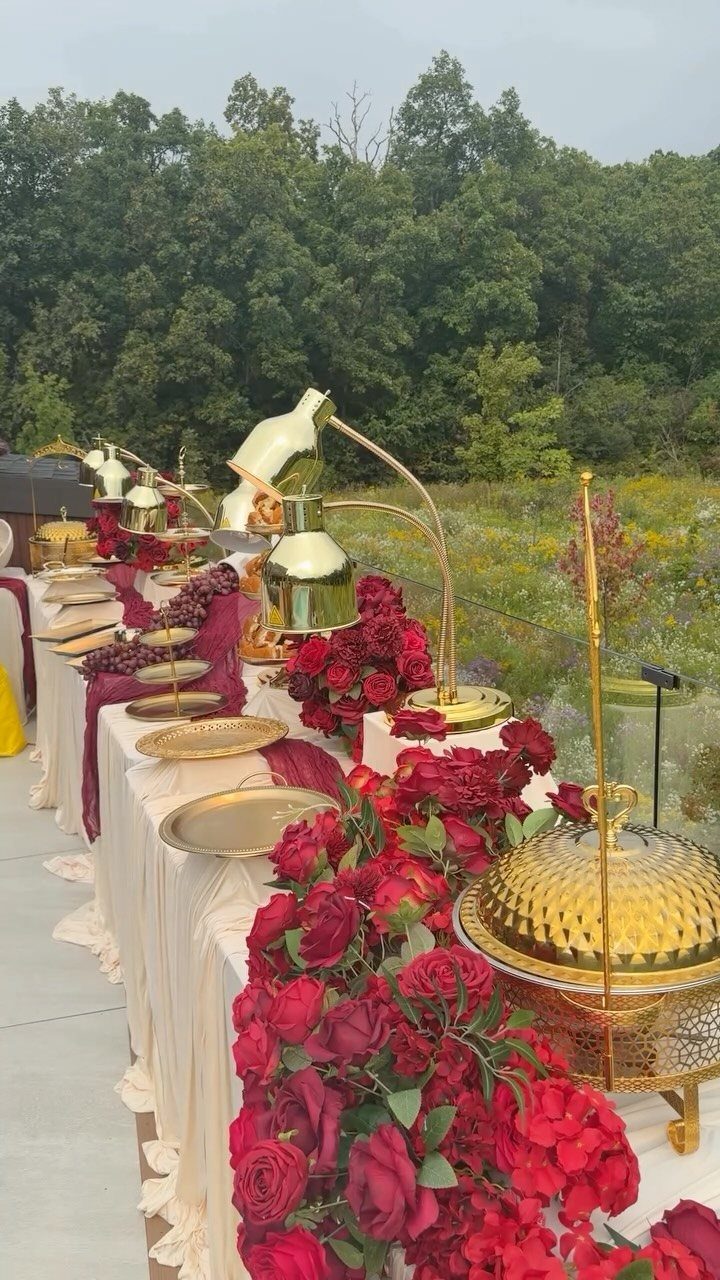
Gold chafing dishes on a table with gold plates read as one set, and that matching is what makes a buffet look styled. Red roses in a garland along the front tie the metal to the flowers.
Match the gold plates to the dishes, as here, so no single piece looks like a stray.
Keep the flowers low and along the edge so guests can lift lids without brushing petals. Gold chafing dishes beat silver only when the plates and flatware can match them too.
8. Tiered Food Display Stands
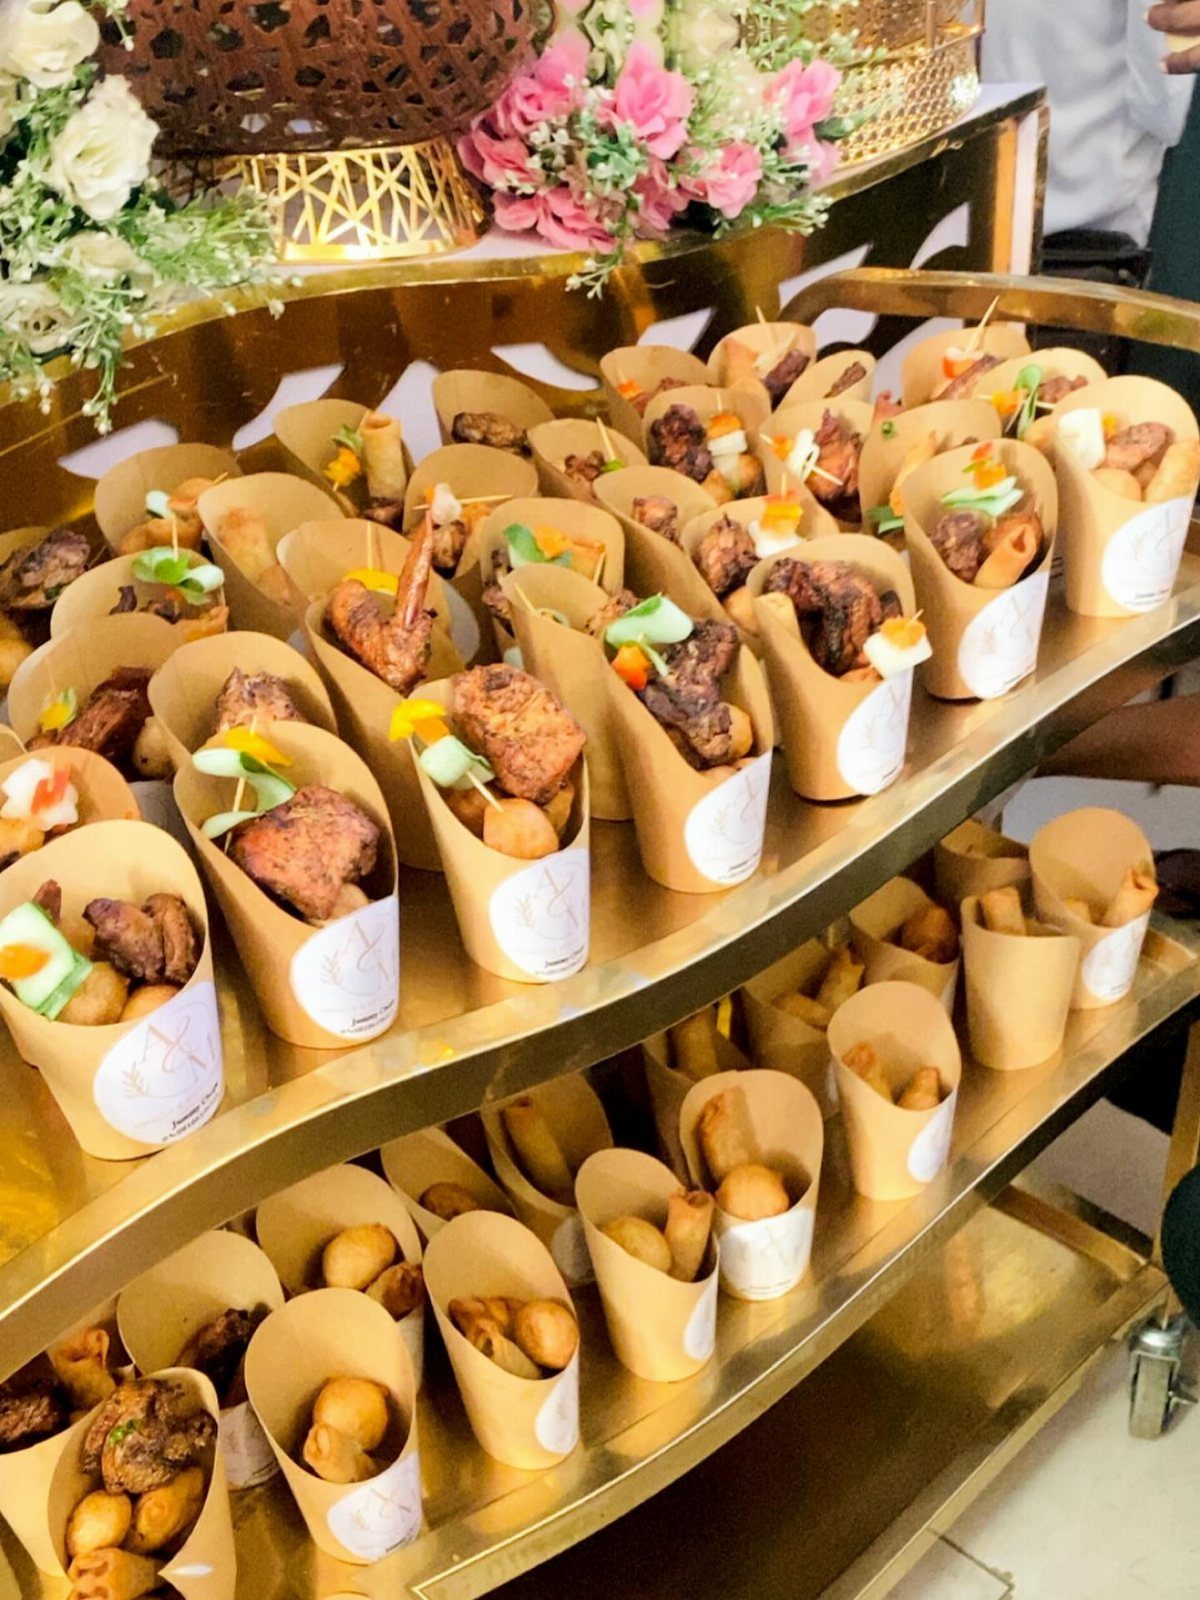
Paper cones of fried appetizers sit neatly on a tiered gold stand, and the tiers do the work of holding a lot of food in a small footprint.
Each cone is a single portion, so guests grab one and keep moving.
Fill the cones just before service so the food stays crisp.
Put the stand where the line starts to slow, and keep a napkin stack beside it. For a modest budget, this is a cheap way to look generous.
9. Classic Silver Chafing Line
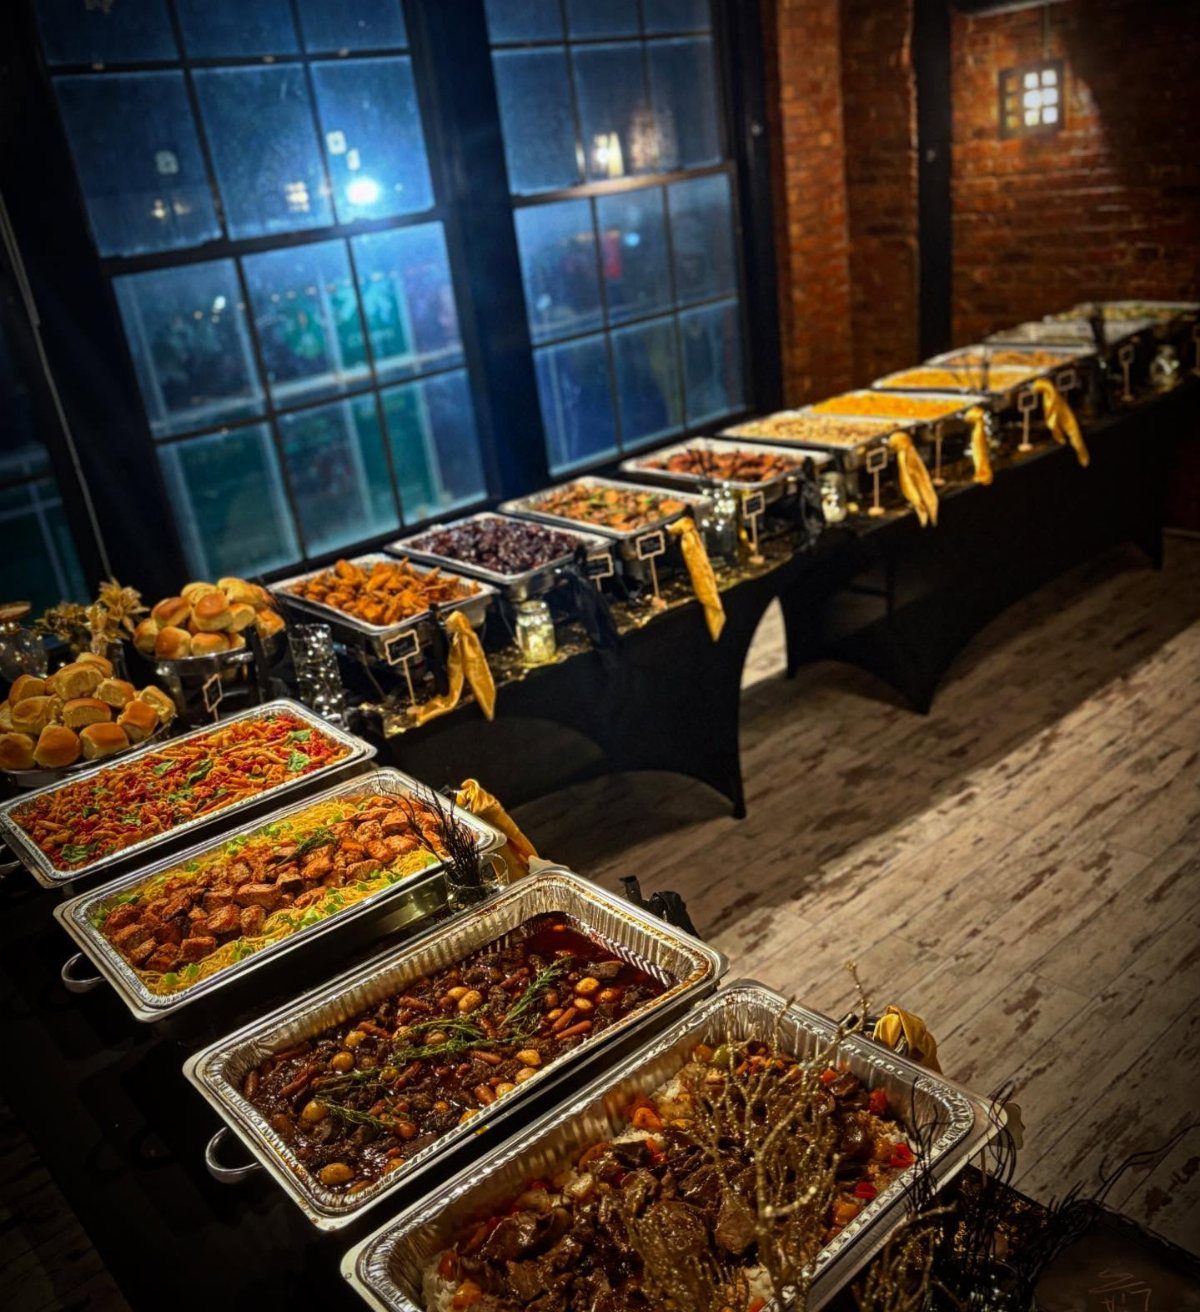
A straight run of silver chafing dishes on black tables is the plain, dependable way to keep hot entrees hot for a long line.
Polished silver goes with nearly any decor, which makes it an easy choice when the room already has strong features like brick and big windows.
Line the dishes up in serving order, mains in the middle, and wipe off fingerprints before guests arrive. Add a cloth or runner if black feels too stark for your style.
10. Individual Pedestal Stations
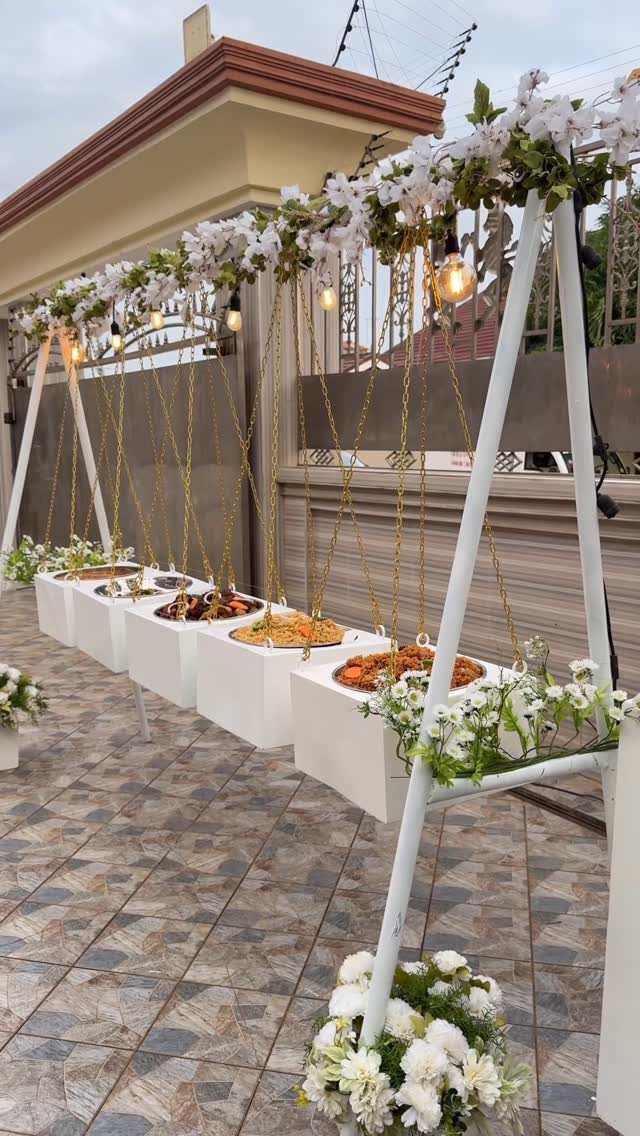
Spacing white pedestals apart gives each platter its own spot, so guests can reach a dish from either side instead of queuing in one file. A floral frame with hanging lights overhead turns the row into a feature.
Leave a few feet between pedestals so plates and elbows fit.
I like this for a patio where one long table would not suit the space. Test the light installation’s power source early, since the setup depends on it.
For a cocktail party with hors d’oeuvres, count on one 7″ plate per person per hour. For a buffet, two to three dinner plates per person, plus one dessert place per person is a safe bet.
11. Cascading Fresh Fruit Display
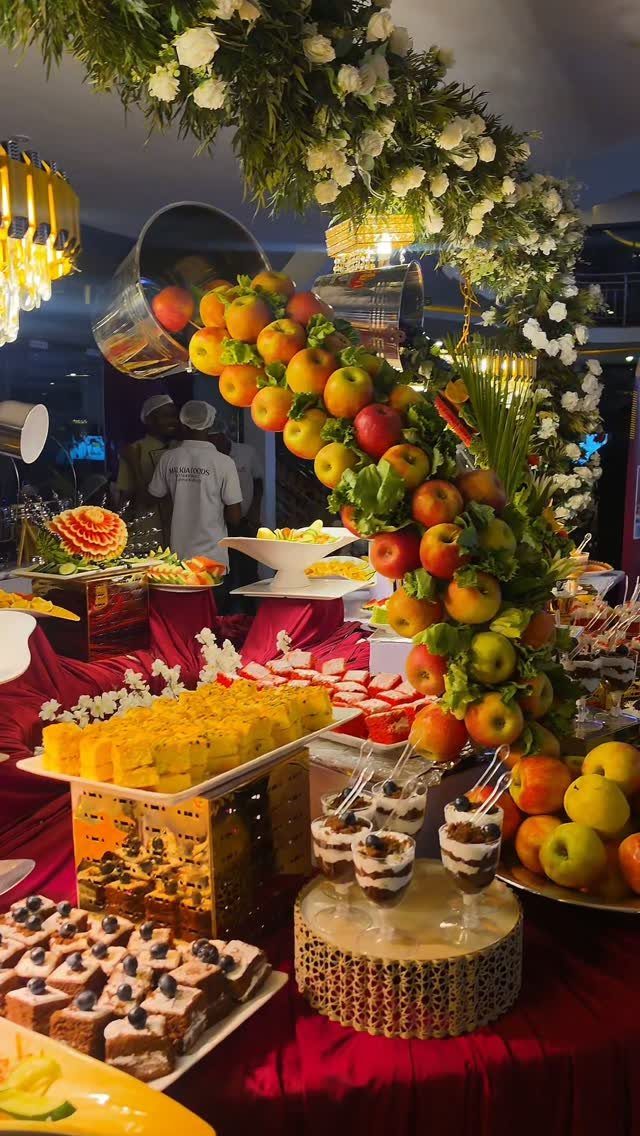
Whole apples stacked in a cascade give a dessert table height and color for little money, since fruit costs far less than another cake. Red apples against red linens keep the palette tight.
Build the stack on a sturdy riser or box hidden by the cloth, and set the fruit in tight so nothing rolls.
Place cakes and desserts beside the cascade rather than in front of it. Keep a few spare apples on hand to fill gaps once guests start taking some.
Importance of Buffet Setup
A buffet lets guests pick their own food and portions and eat at their own pace, which plated service can’t do. It also uses the room efficiently and gets people talking about what they put on their plates.
Self-service speeds things up, so the timeline gets easier to manage.
Still, a single long line can undo that gain, so give every big bowl or tray its own serving utensil. Guests who grab a spoon for the pasta shouldn’t have to wait on the person ahead of them.
Set out more than one row of cups so guests can take a couple at once if they need to.
Stack napkins at both ends of the buffet, because guests who skip them on the way in will want one by the time they reach the last dish.
A buffet also gives the room a focal point. If the budget allows only one splurge, a velvet cloth in burgundy, cream or gold runners, and candles in gold holders make a spread look intentional.
Frequently Asked Questions
What are some creative ways to decorate my buffet?
Seasonal pieces and a backdrop do the most for the least money. Pick one seasonal cue, like red berry branches, pine greenery or white pillar candles set at mixed heights, and the buffet reads as part of the month.
A white arch or curtain behind the table gives guests a spot for photos. Decor should sit behind the food or low along the front edge, so no one has to reach over a centerpiece to get to the chicken.
Candles are the one item to clear first, since some venues ban open flame and you’d rather learn that before you pay for them.
Do I need menus for a buffet wedding?
Printed menus for each guest are optional, but every dish needs its own card on the table.
Large, plain lettering works best, because guests read the cards while balancing a plate in one hand. A short allergen line is worth adding, and printing one spare card per dish covers you if a spill ruins the first.
What is the cheapest way to feed 100 people at a wedding?
A buffet is usually the cheapest way to feed 100 guests: people choose their own food and portions, and self-service moves the line faster than plated courses.
With a crowd that size, split the line into 2 starting points with a plate stack at each end. Fried appetizers in single-portion paper cones on a tiered stand also make a modest spread look generous.